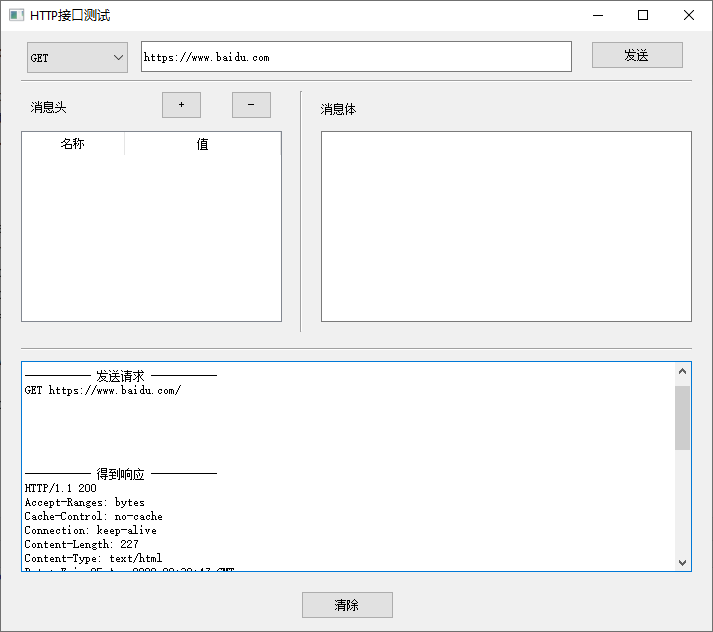
QT program interface a window, controls, is like the above with the corresponding code created.
However, it is difficult to write the interface directly from your head in code.
A lot of times, what the runtime looks like is not what we want it to look like. We often have to modify the code to adjust the position of the controls on the interface and then run the preview. Do this many times over.
But this, really… It’s too much trouble.
In fact, we can use the QT interface generator QT Designer, dragging and dropping can intuitively create the general interface of the program.
So how do I run this tool?
On Windows, run the executable script pyside2\Scripts\pyside2-designer.exe from the Python installation directory.
You can modify the title and placeholderText in the Property Editor.
Interfaces designed through Qt Designer are ultimately saved in a UI file.
So if you go to this UI file, it’s just an XML definition of the interface.
defhandleCalc(self): info = self.ui.textEdit.toPlainText()
salary_above_20k = '' salary_below_20k = '' for line in info.splitlines(): ifnot line.strip(): continue parts = line.split(' ')
parts = [p for p in parts if p] name, salary, age = parts ifint(salary) >= 20000: salary_above_20k += name + '\n' else: salary_below_20k += name + '\n'
There is another way to use the UI file: convert the UI file directly into the Python code file that contains the interface definitions, and then use the class that defines the interface in your program
Run the following command to convert the UI file directly to the Python code file that contains the interface definitions:
1
pyside2-uic main.ui > ui_main.py
If you are installing PyQt5, execute the following command conversion format:
1
pyuic5 main.ui > ui_main.py
Then use the class that defines the interface in your code file as such:
So which method should we use better? Load dynamically or convert to Python code?
Usually use dynamic loading is more convenient, because after changing the interface, do not need to transform, direct operation, especially convenient.
However, if your application has controls that are not provided by Qt Designer, you will need to add some additional declarations to the code, and there may be some strange problems. Converting Python code is often the way to go.
import requests from PySide2.QtCore import QObject from PySide2.QtGui import QIcon from PySide2.QtUiTools import QUiLoader from PySide2.QtWidgets import QApplication
The most common Layout we use is the following four types,
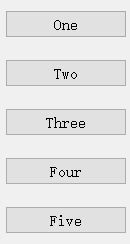
QHBoxLayout (Horizontal)
QVBoxLayout (Vertical)
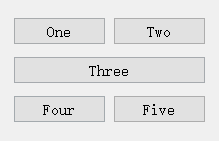
QGridLayout
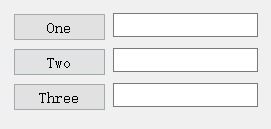
GFormLayout
6. Ajust control position and size
6.1 Ajust the size ratio of the controls in the layout
This can be adjusted by setting the control’s sizePolicy.
6.2 Ajust control spacing
To adjust the upper and lower spacing of the control, you can add a layout to the control, and then adjust the spacing by setting the layoutTopMargin and layoutBottomMargin of the layout.
6.3 Suggested interface layout steps
Don't use any Layout first, put all the controls on the interface by position.
Then start from the innermost layer to set the Layout of the control.
Gradually expand to the outer layer to set the Layout of the control.
Finally, adjust the size ration of the controls in the layout, and preferentially use the layoutStrentch property of the Layout to control.